¶ Tile format
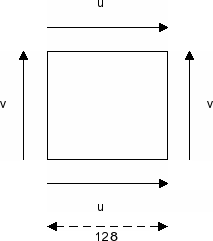
Tile textures are uncompressed TGA images, either 128x128 or 256x256 pixels, in 24 or 32 bit color. See tile bank for how these textures are organized into tilesets.
Creating good tile textures is the trickiest part of building a tile bank. There are strict border rules (explained below) that must be followed, and you should avoid extremes of light or dark so that repetition patterns are not obvious when tiles are placed next to each other.
¶ Border rules
Every tile has a 1-pixel border around its edge. These borders must satisfy two constraints:
- Self-consistency: The left and right pixel columns must be identical, and the top and bottom pixel rows must be identical. This is required for correct bilinear filtering at tile seams.
- Tileset consistency: All tiles (128x128 and 256x256) within the same tileset must share the same 1-pixel border.
The 256x256 tiles have the 128x128 border repeated twice along each edge (since they span 2x2 tiles). They also have internal midline seams where the two halves meet — these midline pixels can be unique per tile, but must be doubled (two identical adjacent pixels).

¶ How borders overlap at render time
At render time, adjacent tiles share their border pixels — the last column of one tile overlaps the first column of the next. The diagrams below illustrate which pixels collapse onto each other.
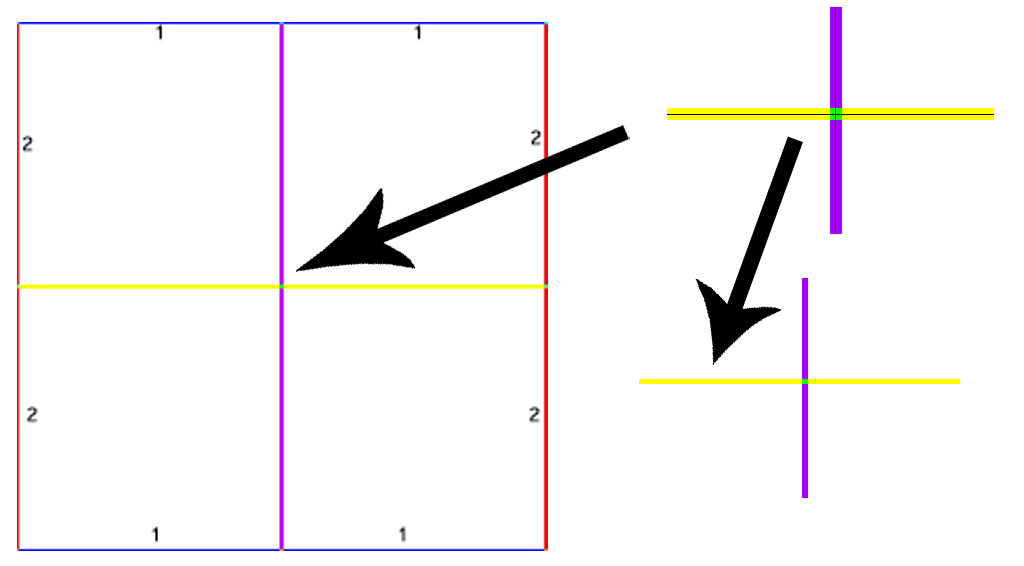
In the layout diagram, edges labelled "1" share the same pixel row, and edges labelled "2" share the same pixel column. The colored lines show matching pairs:
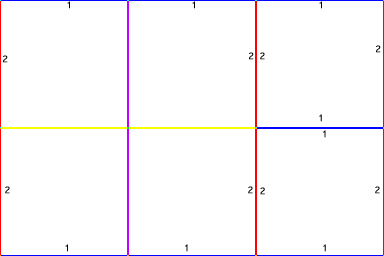
When rendered, the matching border lines collapse onto each other:
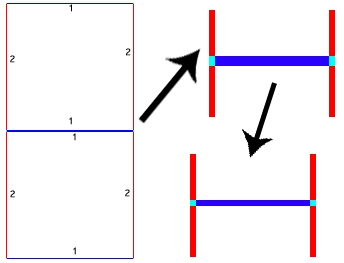
For 256x256 tiles, the internal midlines also collapse in the same way:
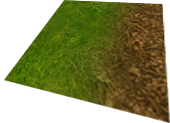
¶ Tile transitions
A tile transition blends between two tileset materials using three layers:
- Layer 1 — the foreground tile's diffuse texture
- Layer 2 — an alpha mask defining the blend boundary
- Layer 3 — the background tile's diffuse texture underneath
The result is a smoothly blended tile:
See tile bank for the full 48-transition set and details on the 12-to-48 rotation mapping.
¶ Naming conventions
Tile files should follow the naming convention [NAME][ID].tga to work with the batch load function:
[NAME]— any descriptive prefix. For a batch-loaded set (such as transitions), this must be identical across all files.[ID]— a two-digit number (00, 01, 02, ...) defining the tile's position in the set.
For example:
stone-transition-texture00.tgastone-transition-texture01.tgastone-transition-texture02.tga
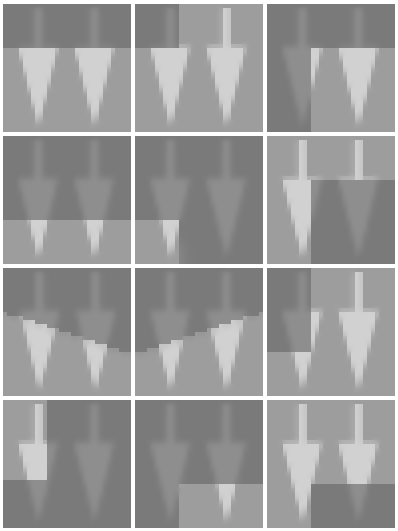
The batch load function in tile_edit.exe loads all alpha transitions in one shot, automatically generating the rotation variations. The 12 unique transition tiles should be numbered in this order:
¶ Creating tile textures
¶ The easy approach
The simplest way to create correct tiles is to author at a smaller size and then duplicate edges to meet the border requirements:
128x128 tiles:
- Author a seamlessly repeating texture at 127x127 pixels.
- Expand the canvas to 128x128 by duplicating the first column as the last column, and the first row as the last row. Since the texture repeats seamlessly, this produces correct left=right and top=bottom borders automatically.
- For subsequent tiles in the same tileset, reuse the same 1-pixel border — only the inner 126x126 area varies between tiles.
256x256 tiles:
- Take your 128x128 border and tile it 2x2 into a 256x256 canvas. This gives you the correct outer border and doubled midline seams.
- Remove one of the two duplicated midline columns and one of the two duplicated midline rows to get a 254x254 working canvas. The outer 1-pixel border and the single midline pixel are fixed; the freely authorable area is two blocks of 126x126 on each axis (separated by the midline).
- Author your artwork inside these blocks, keeping the outer border and midline pixels fixed.
- When done, duplicate the midline row and midline column back out to restore the 256x256 size. The outer border is already correct from step 1, and the middle seams are correctly doubled.
This approach makes border correctness trivial — you never need to retrofit borders onto finished artwork.
¶ Alternative approach in GIMP
Here is another way to create tiles, starting from a photo or found texture:
-
Get a source image with some variation but no radical differences of dark and light. Ideally it should have a consistent base color throughout and be 512x512 or larger.
-
Use a fixed 128x128 selection to cut several samples from the source image. Usually 3 or 4 is sufficient for variety.
-
Cut several 256x256 samples as well. You need at least 6 of these.
-
Fix the first 128x128 border: Copy the top row of pixels over the bottom row. Copy the leftmost column over the rightmost column. Save and test in the tile editor.
-
Copy the border to all 128x128 tiles: Select the 1-pixel border around the outside (select 126x126 in the center, then invert the selection). Copy this border and paste it into all other 128x128 images.
-
Create the 256x256 borders: Tile the 128x128 base image 2x2 into a new 256x256 image. Extract its outer 1-pixel border and middle seam pixels, then paste these into all 256x256 images. Remember that the middle seam pixels must be doubled.
Once done, all border requirements will be met for the tile editor.